
Are you ready to take your website to new heights? Looking to expand your online empire with multiple website domain names under your belt? Explore no beyond than Namecheap’s exceptional hosting plan, designed to empower your digital journey. In this comprehensive guide, we’ll unlock the gateway to an enhanced online presence as we will help you in adding a new domain name to your existing hosting plan with Namecheap. Prepare to unleash the full potential of your website as we navigate the steps, unveil expert tips, and empower you with the knowledge to seamlessly integrate a new domain name. Let’s start our captivating journey of growth and success in the realm of web hosting with Namecheap.
To incorporate a new domain into your current hosting plan, you’ll need to create an addon domain within your hosting’s cPanel(control panel).
How to Create an Addon Domain in Namecheap Hosting cPanel
Follow these 3 simple steps to easily create an addon domain in your website’s hosting cPanel:
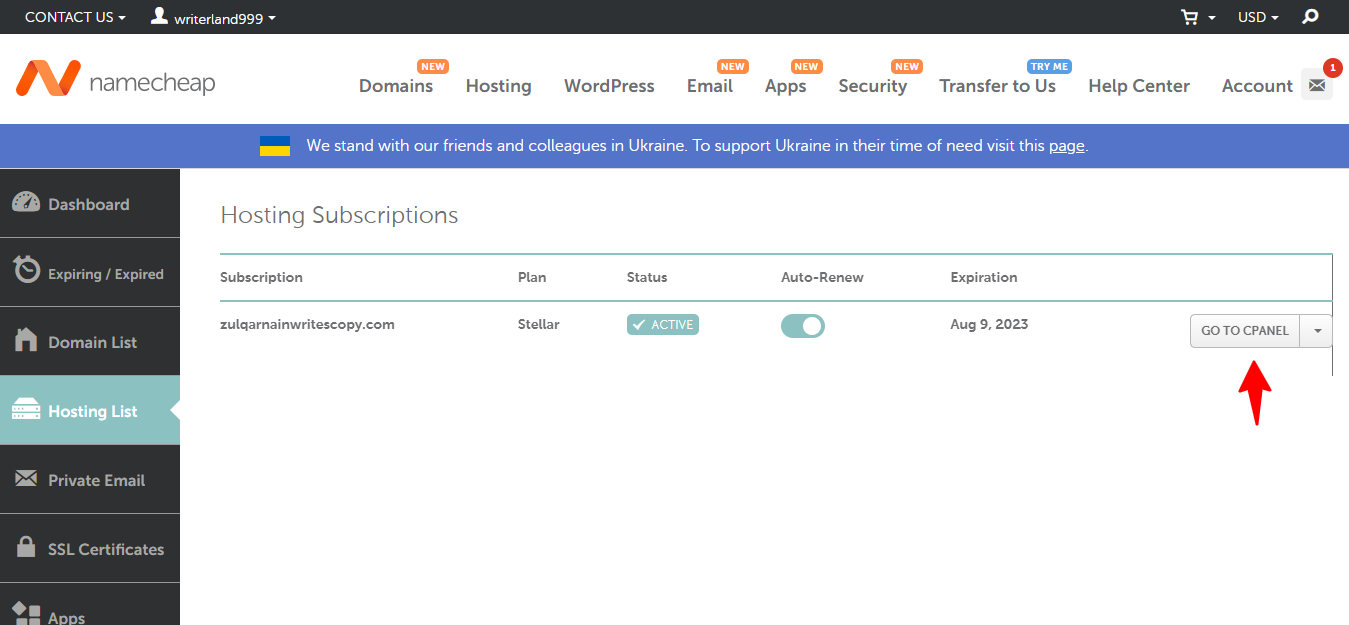
Step 1: Open your hosting cPanel
Firstly, log in to your Namecheap account at https://namecheap.pxf.io/P0oVxR. Secondly, navigate to the Hosting List tab from the left sidebar of the Namecheap dashboard. Thirdly, click on the Go to cPanel button in front of your hosting plan.
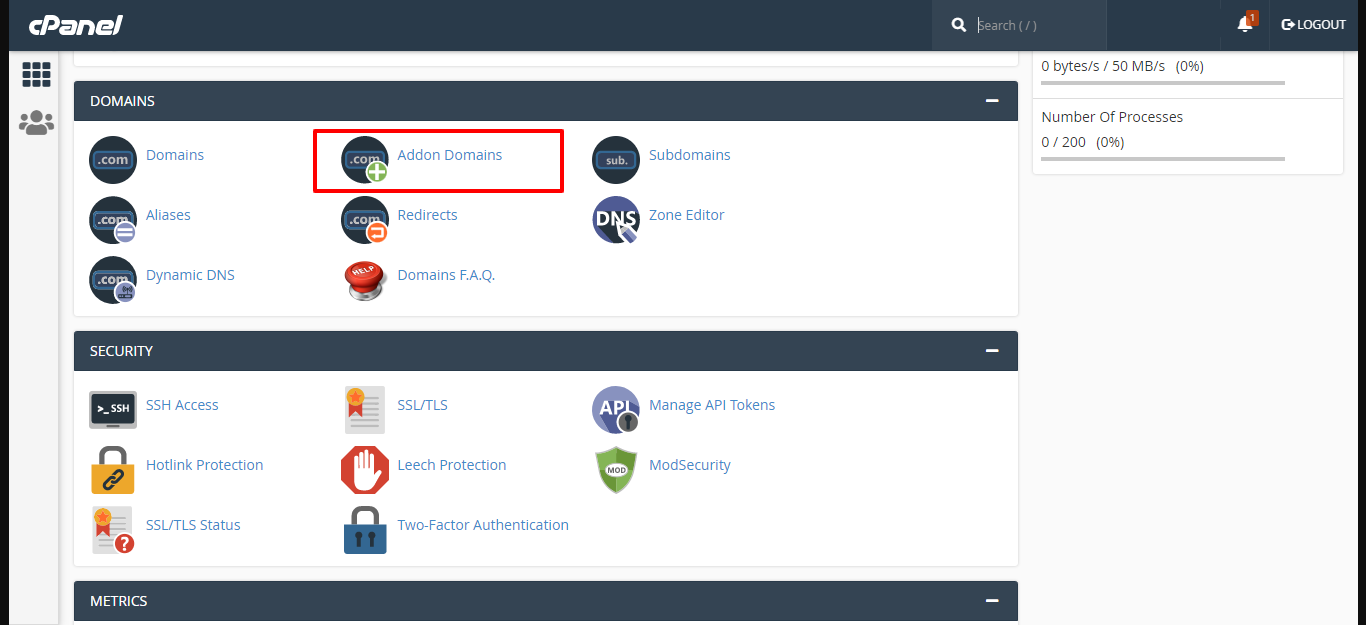
Step 2: Select the Addon Domains option within cPanel
Once you have accessed the cPanel, navigate to the Domains section. Then, click on the Addon Domains option inside the Domains section of cPanel.
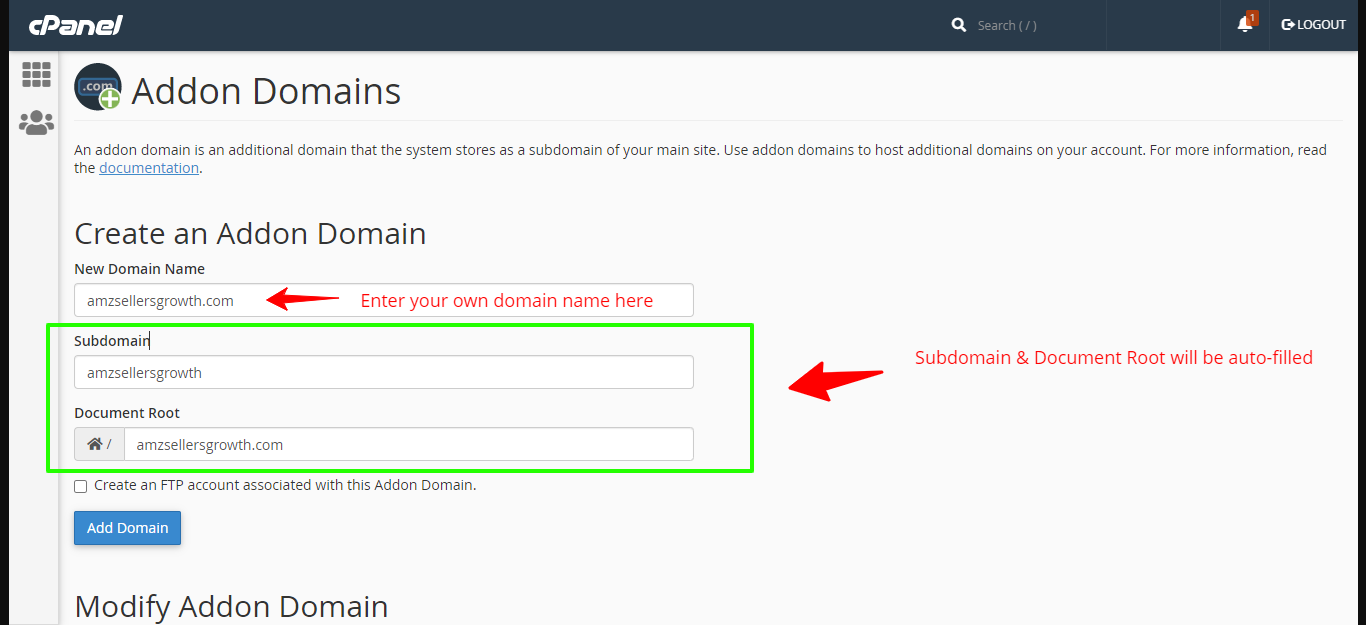
Step 3: Create an Addon Domain in cPanel
In this step, create an addon domain by inputting your desired domain name in the New Domain Name field. Once you’ve done that, the “Subdomain” and “Document Root” fields will be auto-filled. Now, just click on the Add Domain button.
Lastly, you will receive a confirmation message indicating the successful completion of the process. This is it!
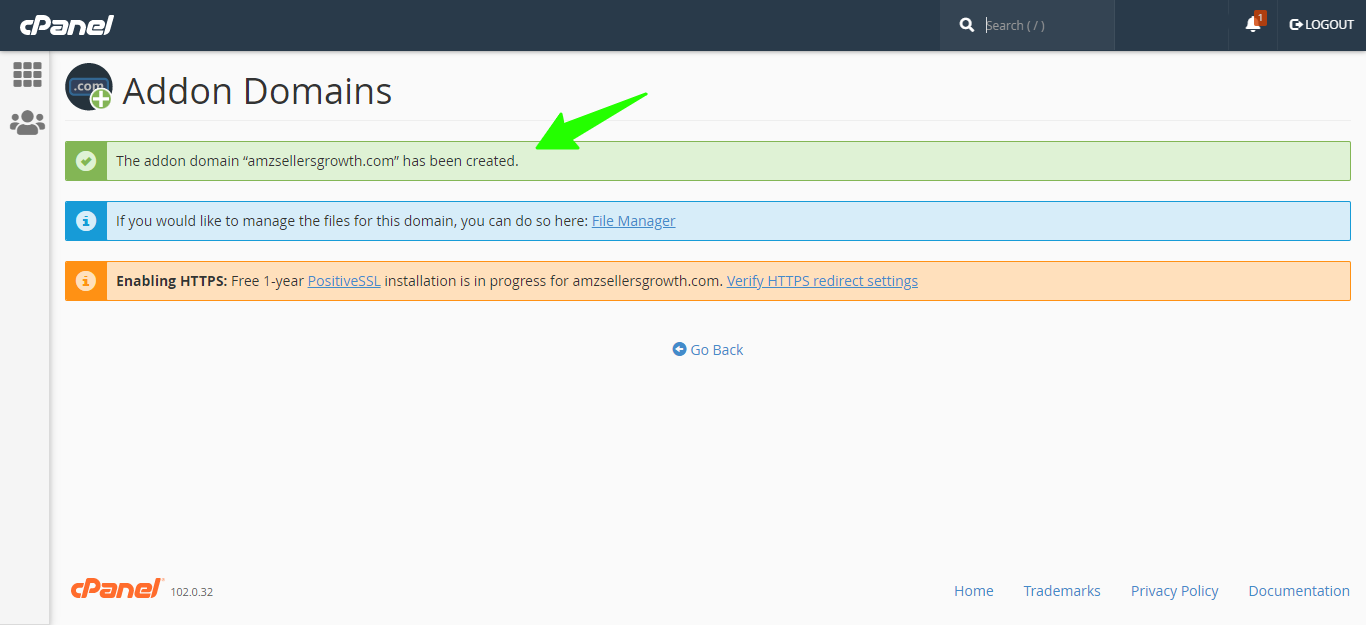
In order to access your new domain, you have to wait for the DNS propagation process to be auto-completed by Namecheap. This process can take up to 24 hours. Once the DNS propagation is complete, you should be able to access your new domain name within your existing hosting plan.
Conclusion
Congratulations on mastering the art of integrating new domain names into your existing Namecheap Shared hosting plan. In order to add a new domain name in your current Namecheap hosting, you simply need to create an addon name in your hosting cPanel. So, start adding new domain names to your Namecheap hosting plan today, and embark on a remarkable digital expedition that will shape your online destiny. The future is now, and it’s waiting for you with open arms. Good luck!
In case of any queries, feel free to ask in the comment section below. We would be glad to help you.
Moreover, have a look at our interesting guides on How to get a FREE domain name with hosting? and How to add a free SSL certificate to your website’s domain name?
If you are a beginner and don’t know how to install WordPress from cPanel, then have a look at this helpful article: How to install WordPress from cPanel.


Leave A Comment