

In this article, you will learn how to fix the WordPress “Theme installation failed” error due to an old or deprecated PHP version. You will also explore how to update the PHP version from cPanel. We will guide you step by step on how to resolve this error while installing the JupiterX theme on WordPress. If you are installing any other theme in WordPress then you can also follow the same procedure. This solution is applicable to all WordPress themes.
Let’s begin the process:
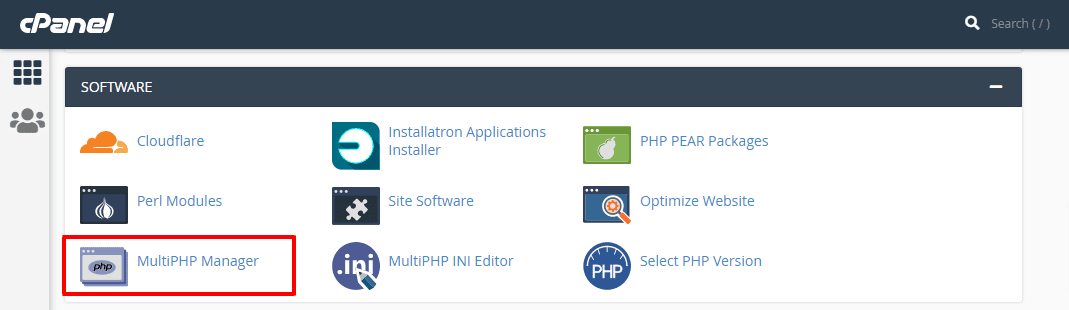
- Click MultiPHP Manager in cPanel[spacer height=”20px”]
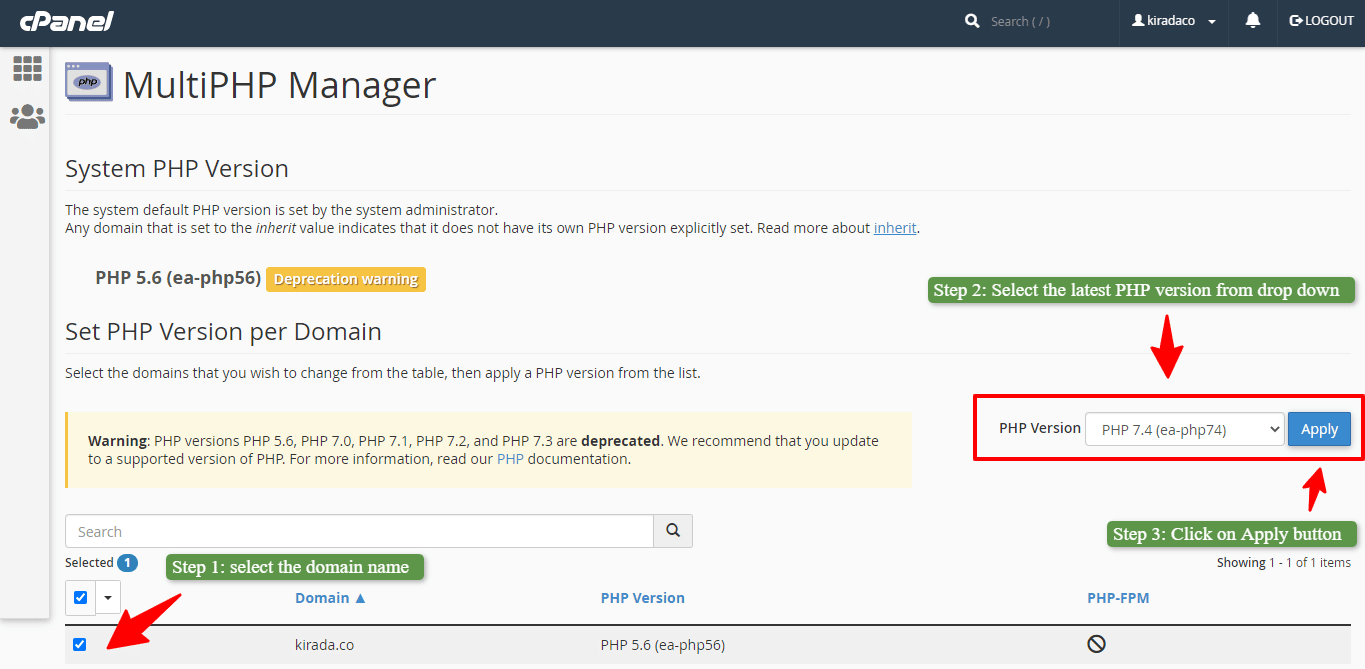
- Apply the latest PHP version to a selected domain name[spacer height=”20px”]
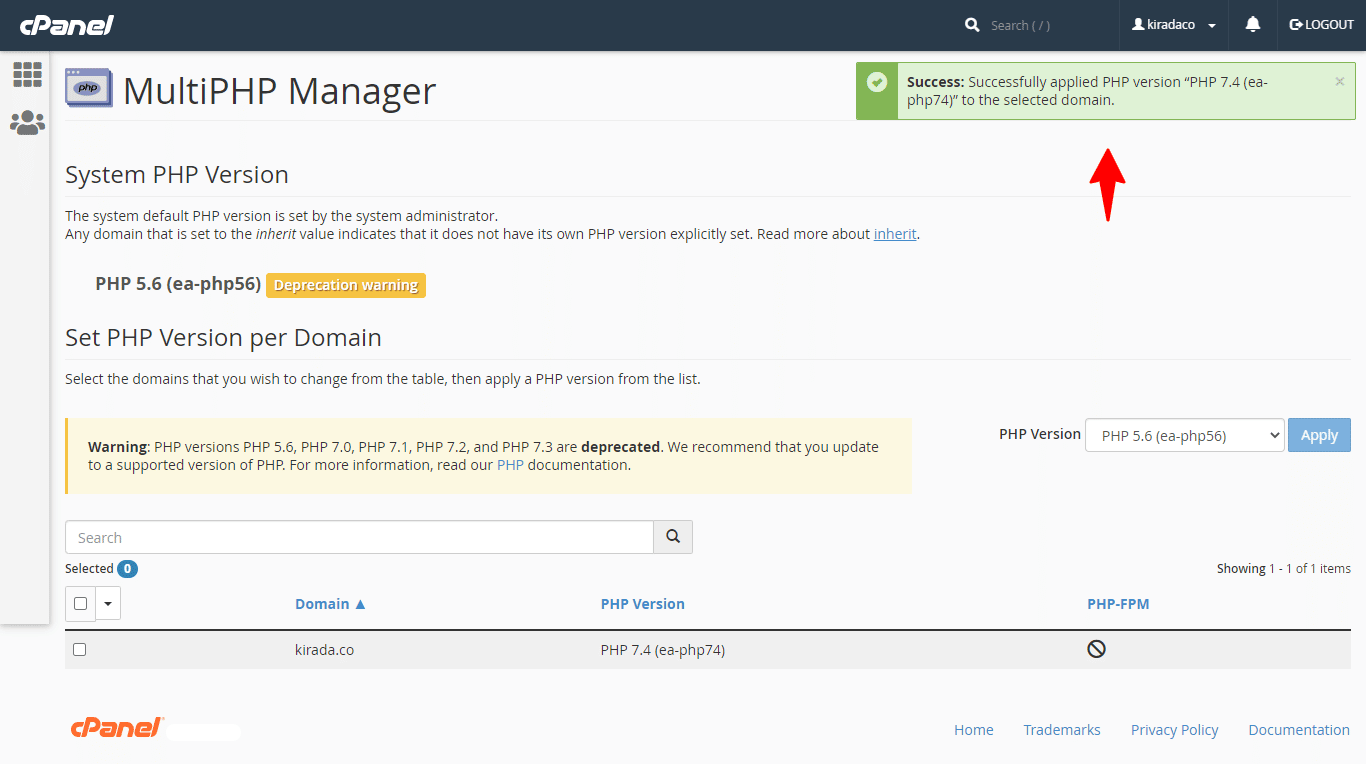
- Wait for a Success Message after updating the PHP version[spacer height=”20px”]
Step 1 – Click MultiPHP Manager in cPanel
Firstly, open your website cPanel. The cPanel login credentials(username and password) are provided by your hosting provider. If you don’t remember those credentials, search for them in your email inbox. Still, if you are unable to find them then contact the customer support of your hosting provider. They will guide you.
Once you have logged into the cPanel, navigate to the Software section and click the MultiPHP Manager option.
Step 2 – Apply the latest PHP Version on a Domain
To proceed further, firstly, you have to select the domain name of your website. Secondly, select the latest PHP version from the “PHP Version” drop-down menu. Lastly, click on Apply button.
Step 3 – Alert for Successful PHP Version Updation
Next, you will see an alert at the top of your cPanel window showing a success message “Successfully applied PHP Version ‘#version no.‘ to the selected domain”.
This alert indicates that you have successfully upgraded the old PHP version to the new one. Congrats! ;)
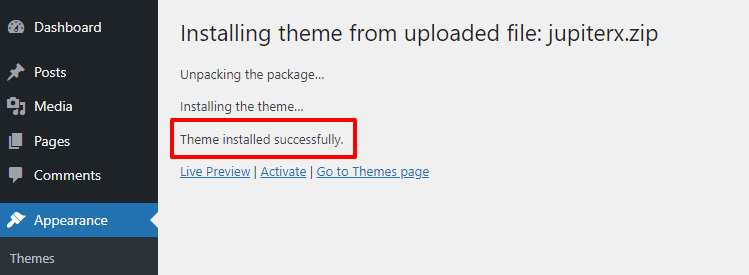
Now, install the theme again by navigating to the WordPress dashboard > Appearance > Themes > Add New > Upload Theme. As a result, you will foresee a success message “Theme Installed Successfully“.
At last, activate your theme and enjoy building your website in WordPress.
Conclusion
We hope you have successfully learned how to fix the theme installation failed error due to the old PHP version. You can easily resolve WordPress errors such as “Package could not be installed” and “Theme installation failed” in the JupiterX theme by updating the PHP version from the website cPanel.
In order to discover how to update the PHP version from cPanel, you have to thoroughly read the above article. If you have any queries, feel free to comment down below. We would happily answer all of your questions.
You may be interested in our other articles related to WordPress and Website Speed Optimization.
Moreover, if you want to create a beautiful, professional, and responsive website in WordPress then you can buy one of the famous themes such as Divi theme, OceanWP theme, and Astra theme that supports Elementor page builder.


Leave A Comment