
WordPress is an open-source software used for creating websites. This software needs to be installed on your hosting server so that you can start using it. Now, you may wonder what a hosting server is? A hosting server is a place where your website files are stored. If you don’t have a hosting server, your website will not be accessible on the internet. That is why you must buy hosting(server) to host/save your website files. Here are some best hosting providers from where you can buy hosting for your website.
Once you have purchased hosting for your website, you will get access to its cPanel. cPanel is a control panel for your website. In cPanel, you can configure your website settings, edit & delete your website files, and manage your website backend.
In this article, we will explain to you step by step how to install WordPress from cPanel easily. Let’s begin!
Step 1: Select WordPress from Softaculous in cPanel
First of all, you have to login into the cPanel of your website. The cPanel credentials are provided to you by your hosting provider. If you can’t find the cPanel login details then you can contact your hosting provider(from where you have bought the hosting for your website). Typically, the hosting companies email you the cPanel login URL and credentials, so you must check your email inbox first.
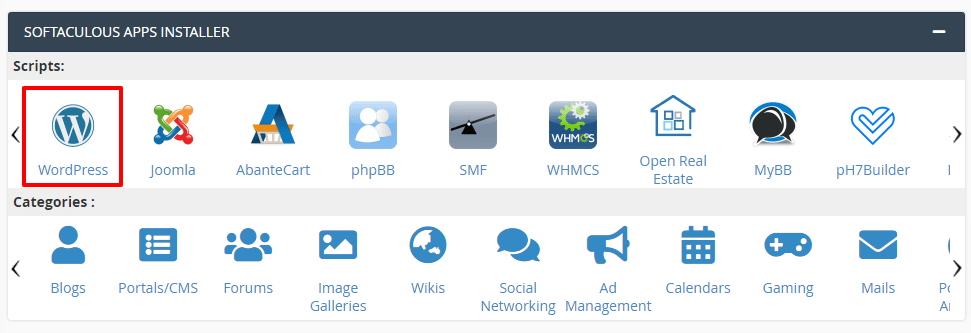
Once you have logged in to the website cPanel, you will see the dashboard with many configuration options. You need to find a section namely “Softaculous Apps Installer“. Inside that section, you will see an option for “WordPress“. Click on that option.
Step 2: Click on the Install button
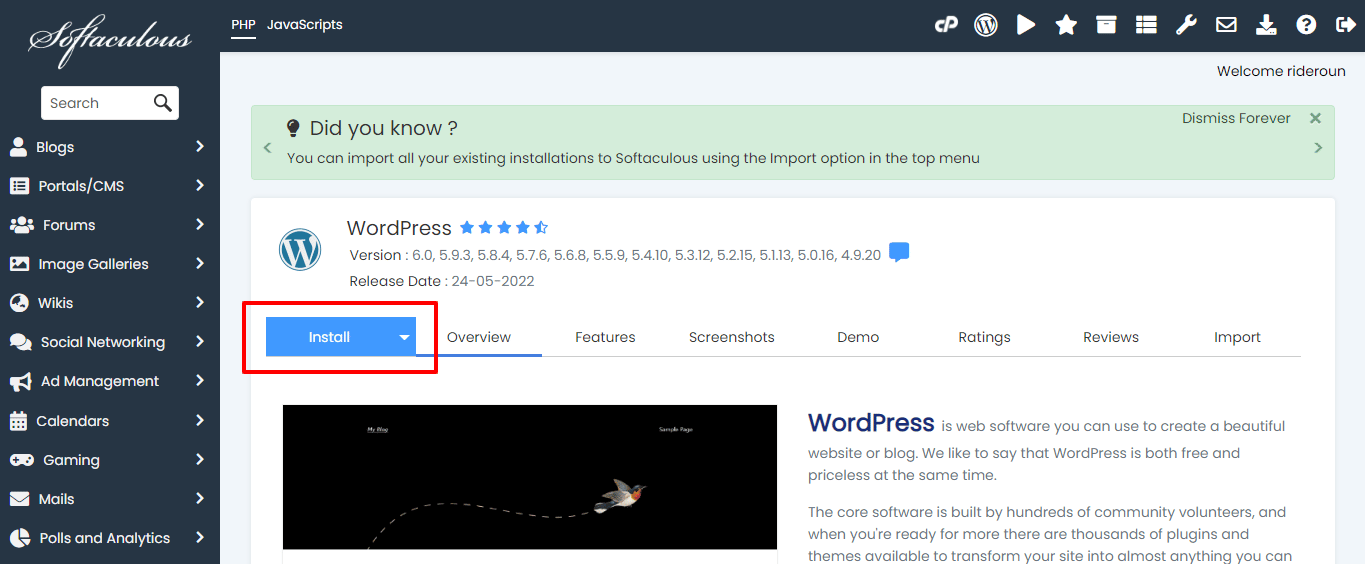
After clicking on the WordPress icon in the Softaculous section, the Softaculuos dashboard will be opened from where you can install WordPress by clicking the Install button under the WordPress section.
Step 3: WordPress Installation Setup
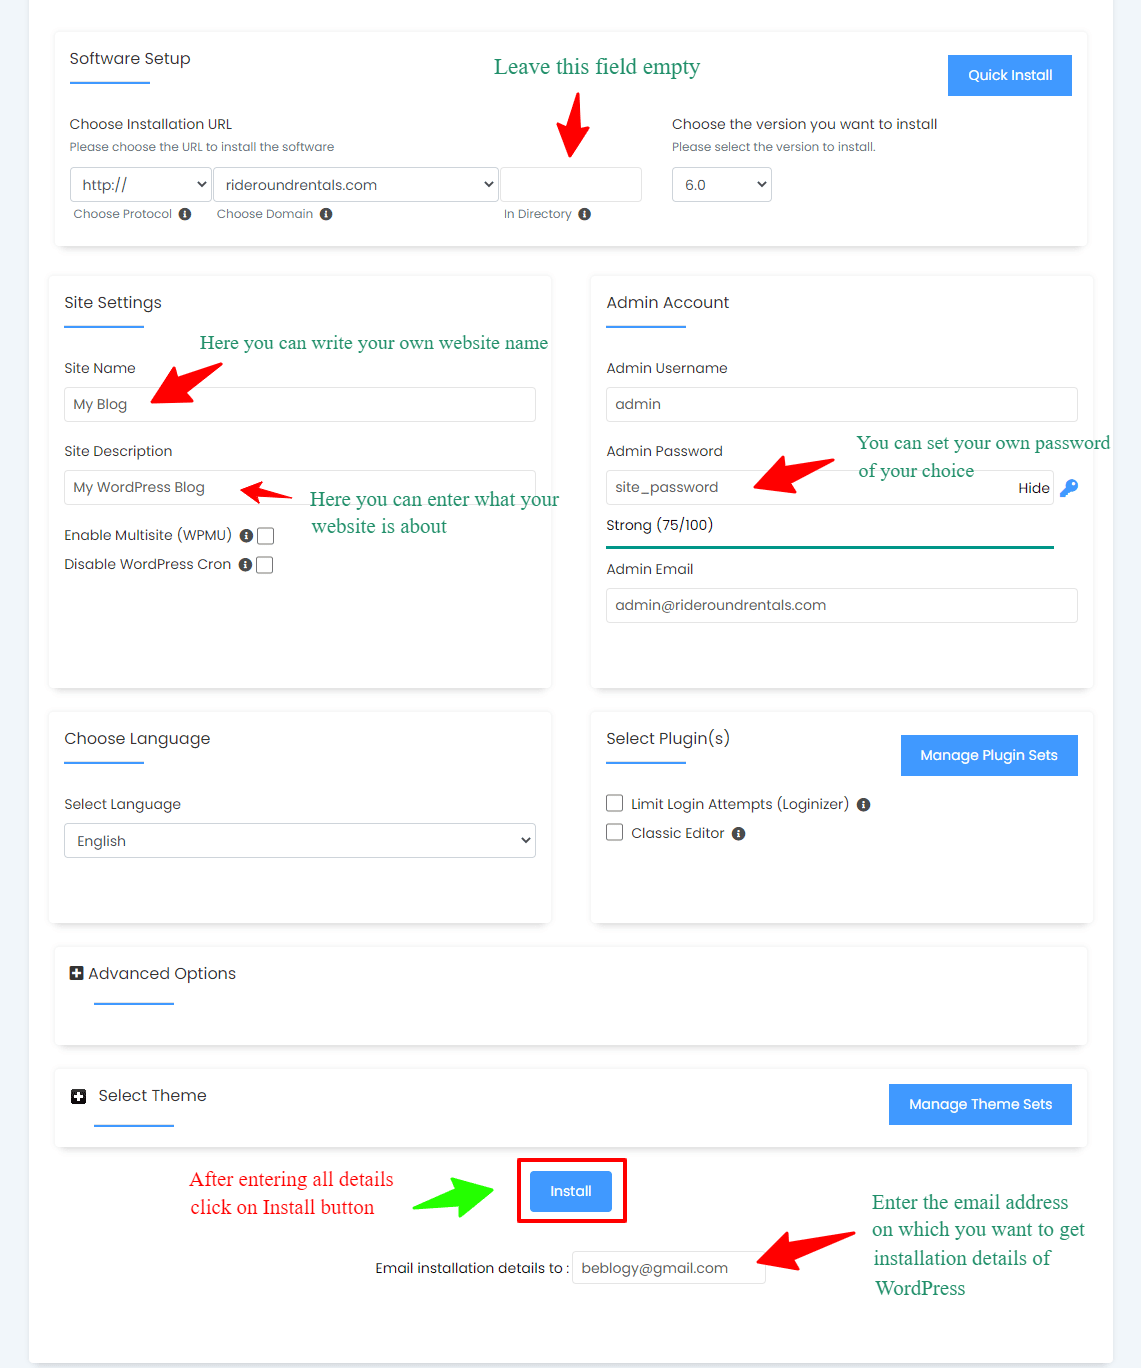
In the 3rd step, the WordPress installation setup wizard will appear once you have clicked on the Install button. In this setup, basic site settings will be displayed. You have to fill up all the required fields like installation URL, site name, site description, admin username and password, and admin email.
Note: Admin Username and Admin Password are the credentials for logging into your WordPress website. So, make sure to remember them or save them in any safe place for later use. Admin Email is the one on which you will receive all WordPress-related notifications. In the future, if you forget your WordPress login password, you can reset the password with the help of the admin email.
After entering all the required information, click on the Install button placed at the bottom of the page.
Step 4: Successful WordPress Installation Message
In the last step, you will get a message for the successful installation of the WordPress tool. Now, you can click on the Administrative URL which will redirect you to the login page of your website.
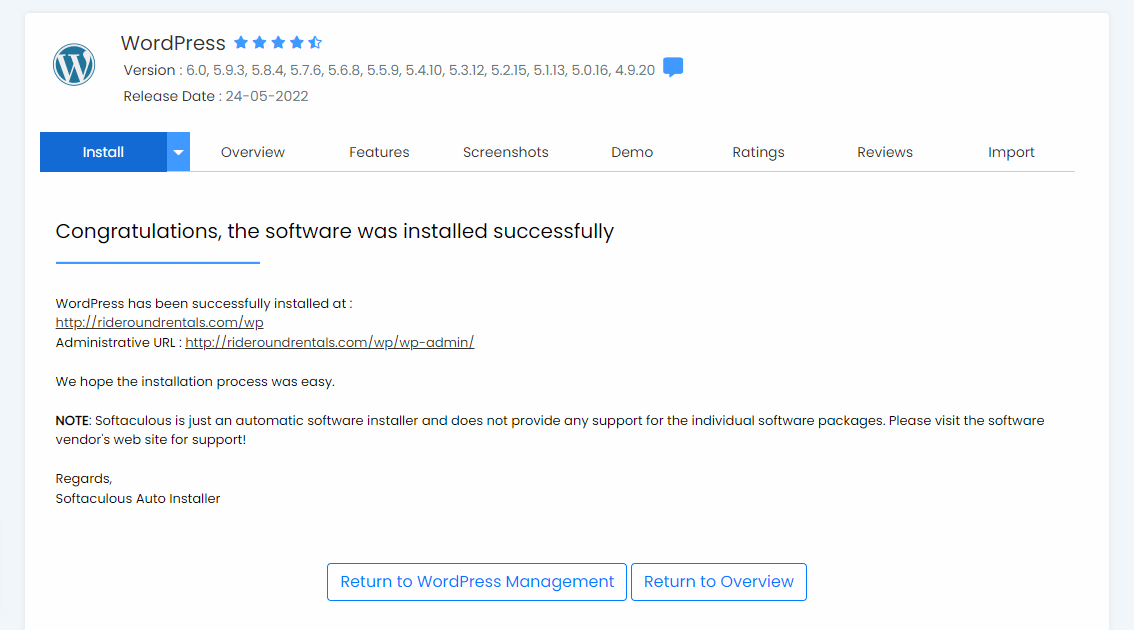
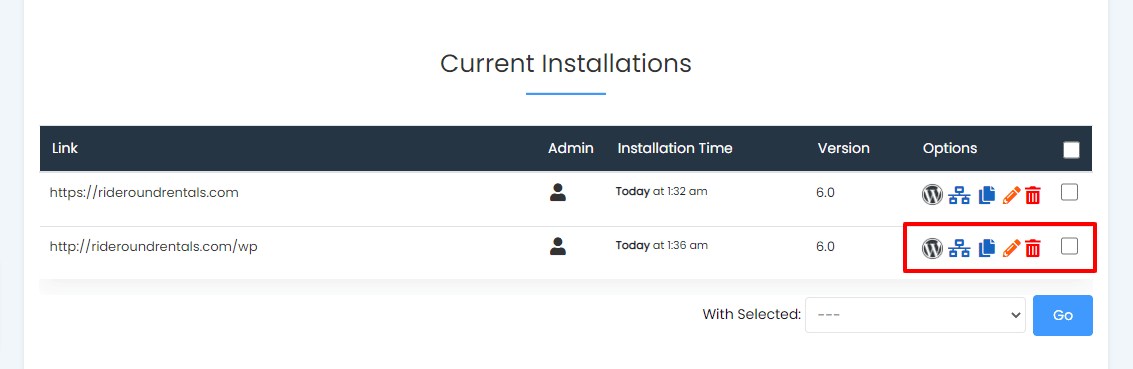
By clicking on the “Return to Overview” button, you will be redirected to the page where all your WordPress website installations are saved. If you want to edit or update the settings of any website, you can do that with the help of the options provided next to the website URL.
Conclusion
In this tutorial, we have explained to you step by step how to install WordPress from the website cPanel. The cPanel provides an easy way to install WordPress software. Firstly, navigate to the Softaculous section inside the cPanel dashboard. Secondly, click on the WordPress icon. Thirdly, click the install button and fill in all the form fields in the WordPress installation setup wizard. Lastly, click on the install button at the bottom of the WordPress installation setup page.
We hope you have enjoyed reading this article and successfully installed WordPress in your website cPanel. In case of any difficulty, you can comment down below and we will be right next to help you.
If you don’t want to make your website live and don’t want to buy hosting for your website yet then you can also temporarily build a website on localhost. For that, you have to install WordPress on Localhost. Localhost is your local computer which acts as a server to store your website files.
After installing WordPress, you may be interested in “How to install a theme on the WordPress website?” and “How to install a WordPress plugin?“.
Also, don’t forget to read our guide on how to set up a website domain name?


Leave A Comment