
If you are looking for a guide on how to install WordPress on your Localhost or Computer, you are in the right place. In this tutorial, we will guide you through step by step process.
To start a website, you need a content management system (CMS). WordPress is one of the most popular available CMS. Learn about WordPress in our detailed guide on “What is WordPress? What is it used for?”
WordPress installation is a quick and easy process with just one click away. It will take a few minutes to have WordPress running on your local computer. Let’s start installing WordPress.
Step 1: XAMPP Installation
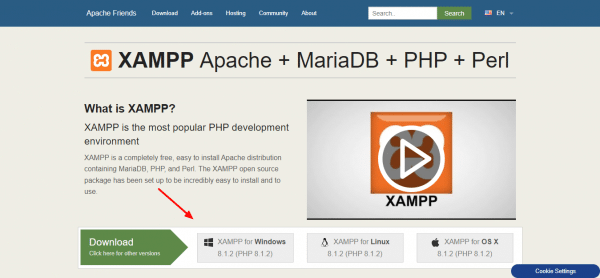
Firstly, you must download and configure ‘XAMPP’ or ‘WAMP’ on your computer. To create a localhost environment, you required Xampp or Wamp. Here we will use XAMPP, which you can also download from this link: https://www.apachefriends.org/index.html and install by the step-by-step wizard.
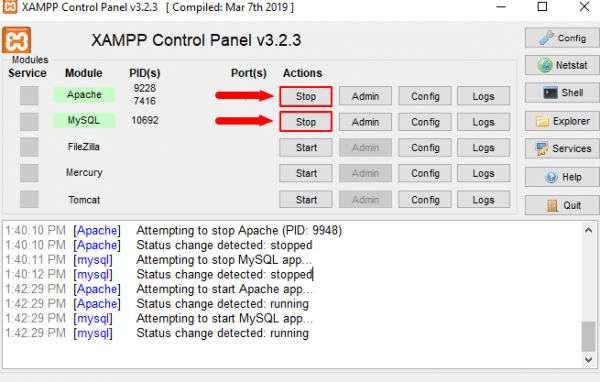
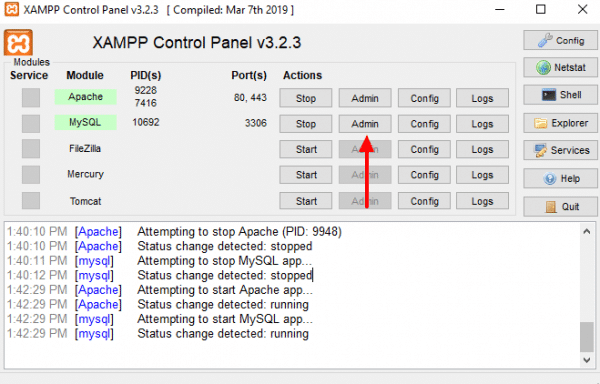
- After installing XAMPP, open the XAMPP Control Panel from the Start menu. Then start two modules: Apache and MySQL.
Step 2: Download WordPress
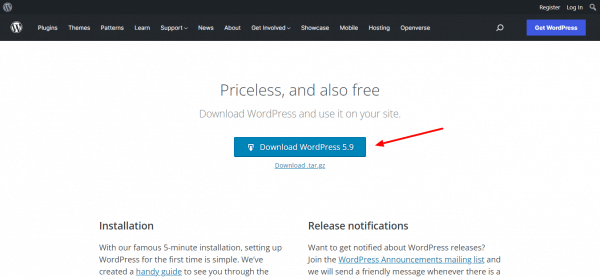
In step 2, download the latest version of ‘WordPress’ from Blog Tool, Publishing Platform, and CMS – WordPress.org
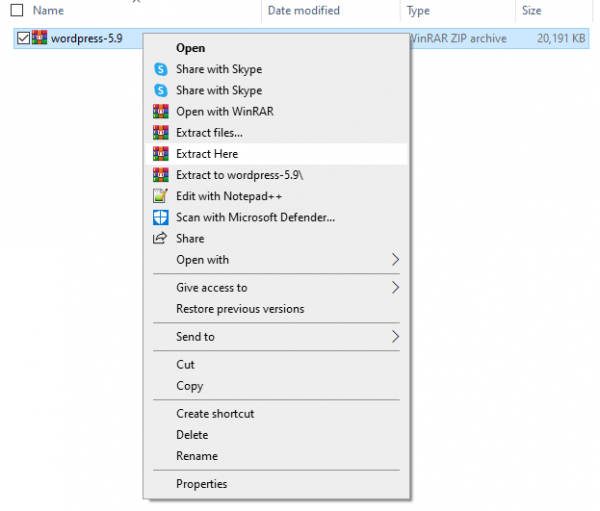
- As a result, a Zip folder of WordPress will be downloaded to your computer. Extract that zip folder. For extracting zip folders, the WinRar software should be installed on your computer.
- In the next step, rename the extracted WordPress folder to any other name (like your project name) because when you create multiple websites, you have to use a separate WordPress folder for each website. So, if you have the same WordPress folder for each website then you won’t remember which folder is for which website. That’s why it is important to rename a WordPress folder for each website to prevent name conflicts.
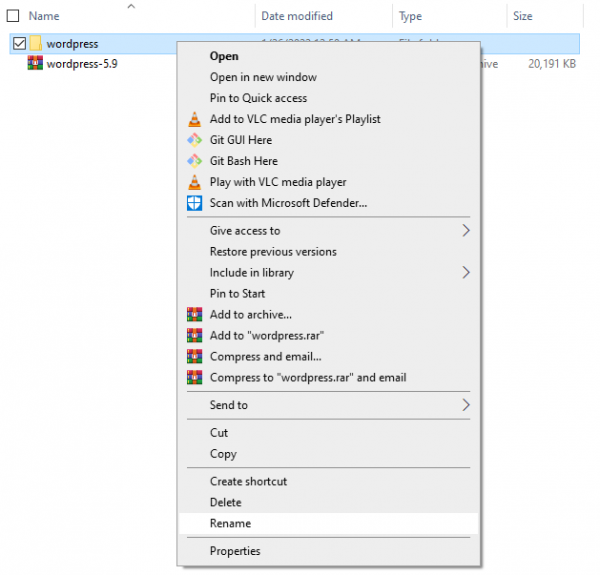
- We have renamed the WordPress folder to the project-name folder.

- Copy the project-name folder. Navigate to the folder where Xampp is installed. Open the XAMPP folder
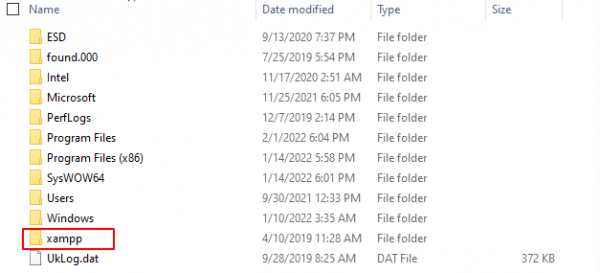
- Go to the htdocs folder which is a subfolder of the xampp folder. Secondly, paste the project-name folder inside the htdocs folder.

Step 3: Create a Database
Now, it is time to create a database for your website. To do that, you have to launch phpMyAdmin by clicking on the Admin button from the XAMPP control panel. The admin button is in the second column of the MySQL module.
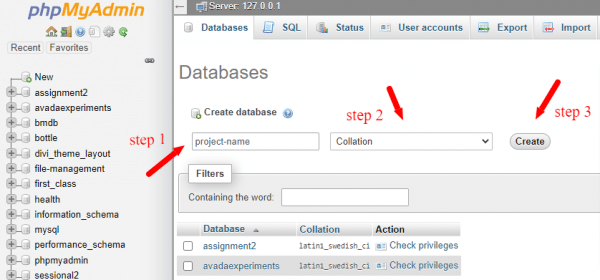
In the next step, create a new database with project-name. The database name should be the same as your project folder name which you have renamed. A database is a place where your website data is stored in the form of tables.
Step 4: Run Installation Wizard
You can visit your website here: http://localhost/project-name/
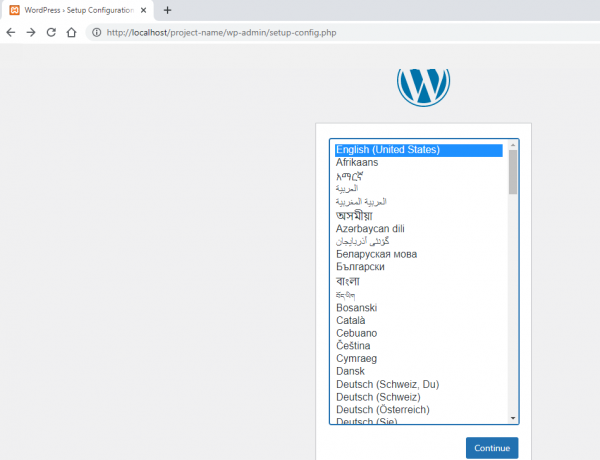
An installation wizard will appear. You must complete that wizard step by step. Firstly, you have to select the language for your website from the language selection list. Secondly, click on the continue button to proceed.
- In addition, you will see some installation instructions for further steps. Click on the Let’s go button in order to proceed to the next step.
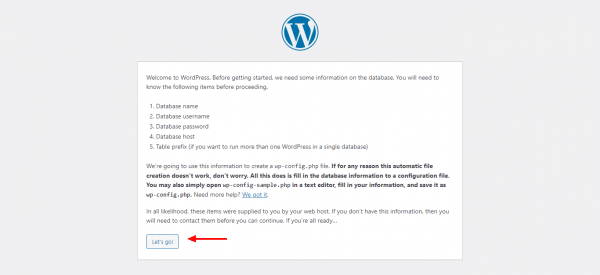
- In the next step, you will see a form in which you have to enter the following database connection details:
Database Name = Name of the database you created in PhpMyAdmin
Username = “root”
Password = leave blank
Database Host = localhost
Table Prefix = wp_
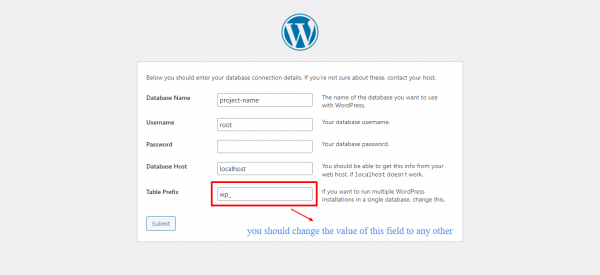
Note: By default, all tables in the database start with the name wp_ which is known as a table prefix. This prefix is set for all WordPress websites by default which is not secure at all because hackers can hack your site data easily as they know that all tables start with the wp_.
So, it is recommended that you change the table prefix from the default value to any other value which is hidden by everyone except you. In this way, your website database will be more secure.
- After filling all fields, click on the Submit button to continue.
- Now, the tables have been created in the MySQL database for your WordPress website. Click on the Run the Installation button to finish the installation process.
Step 5: Enter Website Details
Lastly, you have to give some additional information to set up your website. Enter website details such as:
Site Title: The title for your website
Username: Your username will be required to login to WordPress
Password: The password should be strong in length. Keep remembering this password for later use as it will be required to log in to WordPress.
Your Email: This email will be treated as a recovery email. If you forgot the WordPress login password, then WordPress will send password reset instructions to this email.
Search Engine Visibility: If you want that Google should not index your website and your website should not appear in the search results of Google, then you can check this option.
If you are inserting any dummy content on your website, you can temporarily check this option so that your dummy content should not be visible to search engines. Later, when you remove the dummy content, uncheck this option from the WordPress Readability settings.
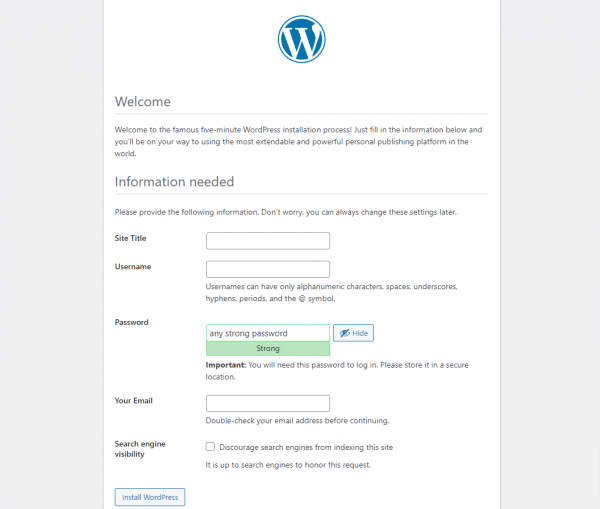
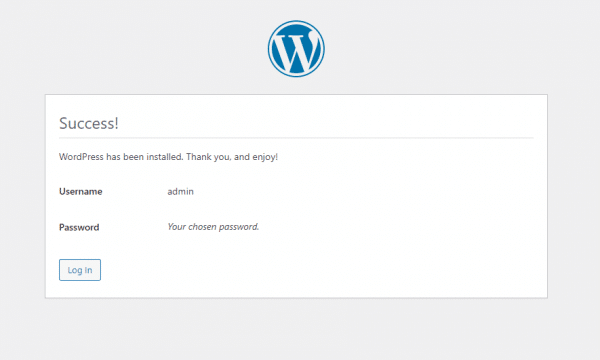
Click on the Install WordPress button to finish the installation wizard. Finally, you will see a success message that your website has been successfully installed. You can now click on the login button to sign in to your WordPress dashboard.
CONCLUSION
We hope you have learned a lot about “How to install WordPress on Localhost”. In this article, we have guided you with a complete step-by-step configuration of WordPress in localhost. As a beginner or intermediate, you have definitely learned through it.
If you want to make your website live, then you have to buy a domain name and hosting for your website. Then you have to install WordPress on the website cPanel instead of localhost. cPanel will be provided to you by that hosting provider from where you have bought hosting for your site. Here are the 5 best WordPress hosting providers for you from where you can easily buy website hosting.
After installing WordPress, you may want to learn “How to install a WP theme” and “How to install a WP plugin“.
Above all, if you still have any questions, let us know.


Leave A Comment